Showing posts with label varitas. Show all posts

Tuesday, 30 January 2024

How to Install and Configure varital cluster ( SFHA) for NFS-Part-2

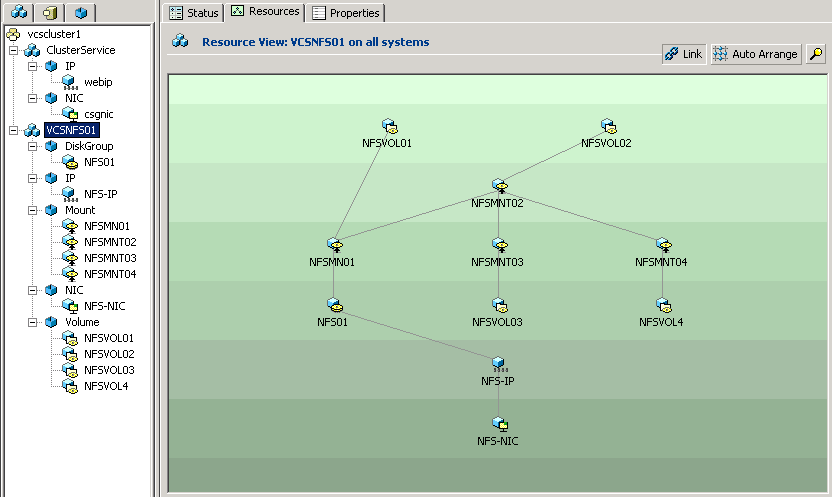
                       Configuration of VCS(SFHA) for NFS


# /opt/VRTS/install/installsf -configure

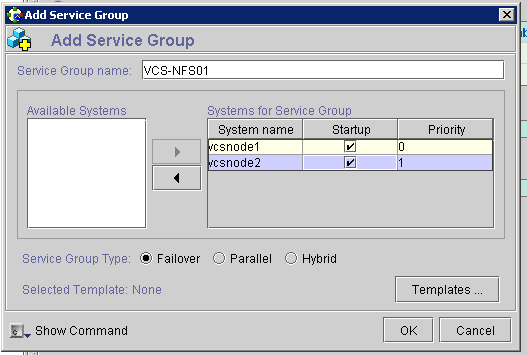
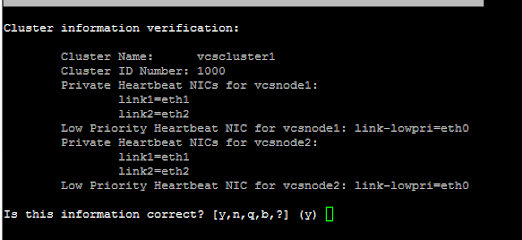
Enter unice cluster name


Presss yes

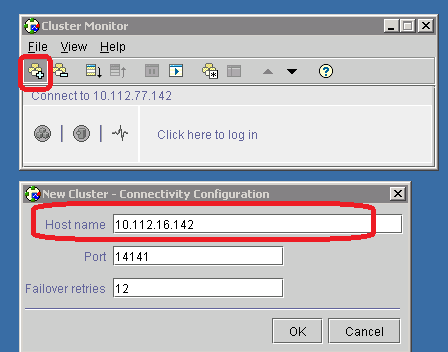
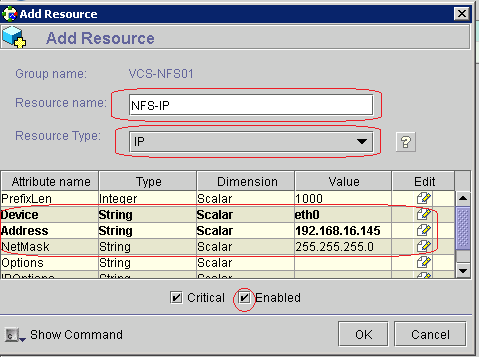
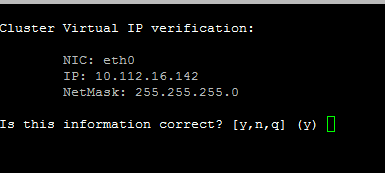
 Enter Virtual IP details


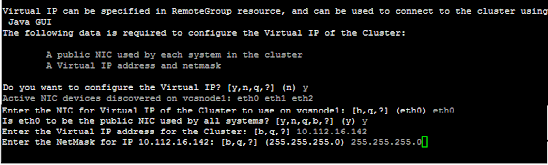
See the virtual ip deyails and type y to confirm

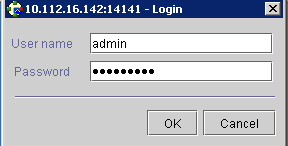
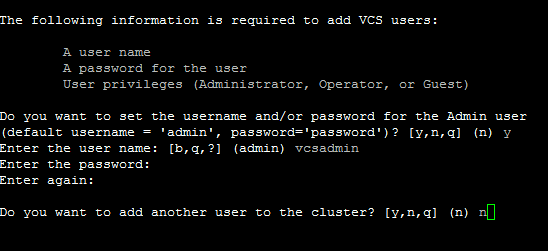
create  vcs user  type y to create new user 

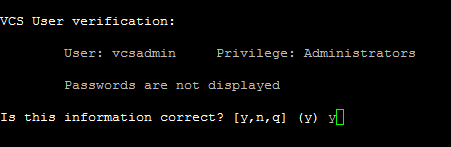
verify the user details if correct type y to confirm

If you want to configure SNMP notification type y if not type n

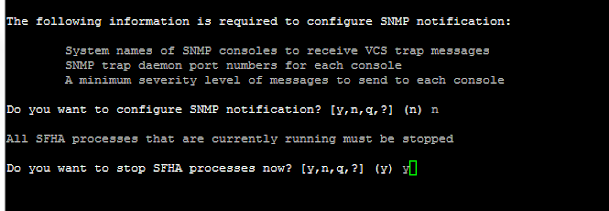
 Installation starting 

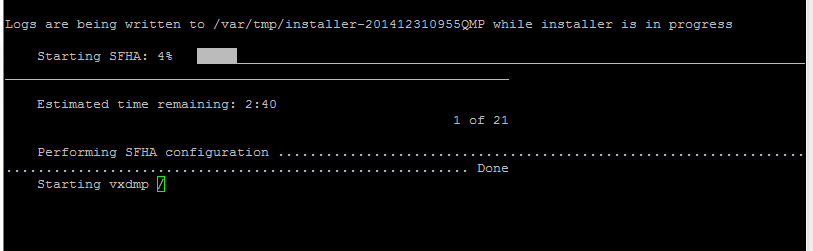
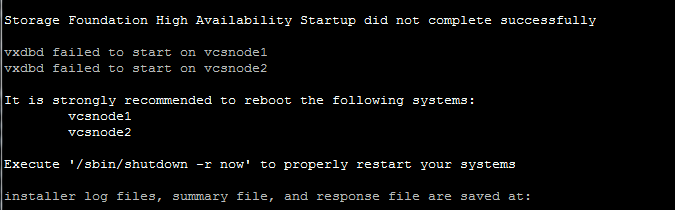
after Installation complated restart the servers.

1. Initialize disks

# vxdisk -e list or vxdisk -eo alldgs list (check on both)

bringing the disk into veritas control 

[root@vcsnode1 ~]# /etc/vx/bin/vxdisksetup -i disk_0

[root@vcsnode1 ~]# /etc/vx/bin/vxdisksetup -i disk_1

[root@vcsnode1 ~]# /etc/vx/bin/vxdisksetup -i disk_2

# vxdisk -e list  (output should be same on both node)

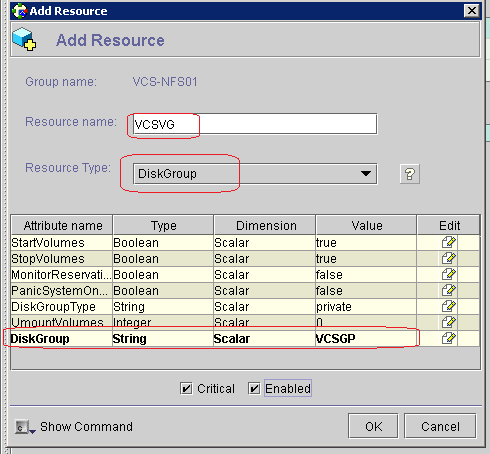
2. Create disk group nfsdg01

# vxdg -o coordinator=on init nfsdg01 disk_0

# vxdg -g vcsgp set coordinator=off

# vxdg -g vcsgp adddisk disk_1

# vxdg -g vcsgp adddisk disk_2

# vxdg -g vcsdp set coordinator=on

Error

ERROR V-5-1-12061 adddisk not permitted on coordinator dg: vcsgp

Solution

vxdg -g vcsgp set coordinator=off

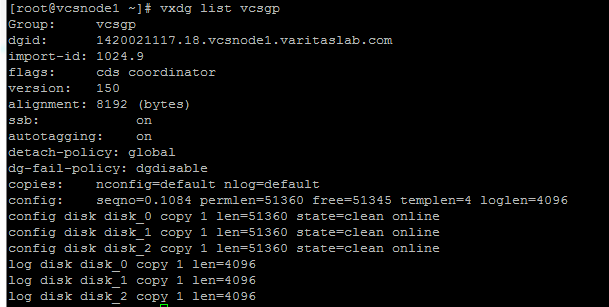
3. Checking the connectivity policy on a shared disk group

[root@vcsnode1 ~]#  vxdg list vcsgp


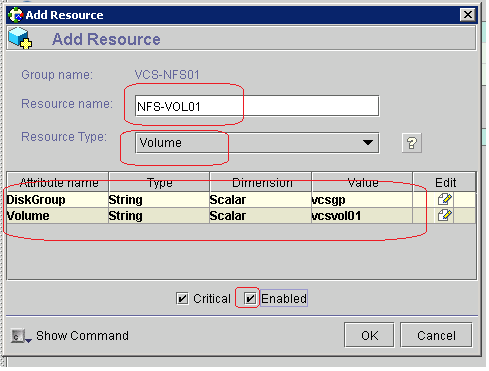
  1. Create logical volume 

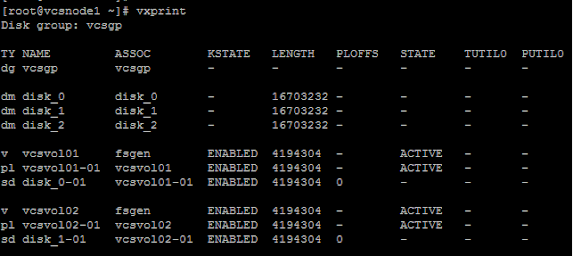
 [root@vcsnode1 ~]# vxassist -g vcsdg make vcsvol01 2G

[root@vcsnode1 ~]#   vxprint 

[root@vcsnode1 ~]#  vxprint –l  <volume_name>    #To print details of volume which you create
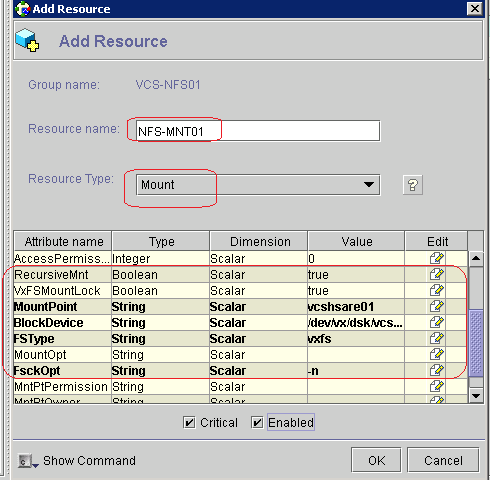
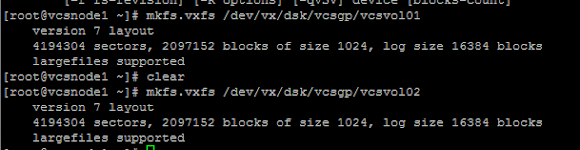
  1. Create file system

    [root@vcsnode1 ~]# mkfs.vxfs /dev/vx/dsk/vcsgp/vcsvol01

  1. Make local directory on both nodes vcsnide1 & vcsnode2


[root@vcsnode1 ~]#  mkdir  -p /vcsshare01  /vcsshare02

[root@vcsnode1 ~]#  mkdir /vcslock

[root@vcsnode1 ~]# chomd 777 /vcsshare01

[root@vcsnode1 ~]# chomd 777 /vcsshare01

root@vcsnode1 ~]# chomd 777 /vcslock

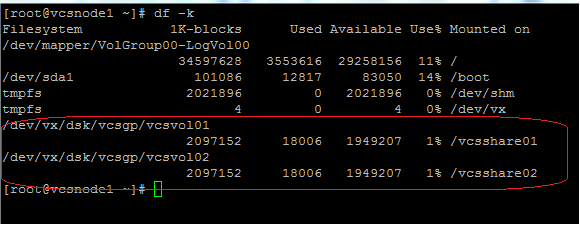
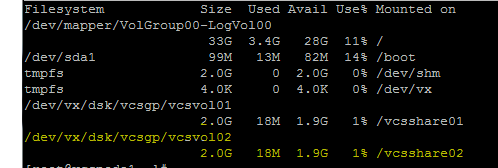
[root@vcsnode1 ~]# mount -t vxfs /dev/vx/dsk/vcsgp/vcsvol01 /vcsshare01

[root@vcsnode1 ~]# mount -t vxfs /dev/vx/dsk/vcsgp/vcsvol02 /vcsshare02

[root@vcsnode1 ~]# df –h #check status


  1. Unmount 

[root@vcsnode1 ~]# umount /vcsshare01

[root@vcsnode1 ~]# umount /vcsshare02


  1. Install the nfs server on both nodes 

Note: no need to start the NFS service veritas will handle it. Stop the NFS service on OS level 


How to Manage varital cluster from Varitas cluster Manager ( NFS) -Part-3


Manages Varitas cluster form Varitas cluster Manager

Install cluster mange console on your laptop or any other system from which you want to manage the cluster. This tool will be available on veritas software.zip 

1. Open veritas cluster Manager

2. Add cluster (enter cluster IP) and click ok


3.Provide credential veritas admin 

4.  Now We are login here  successfully and cluster running on vcsnode1


  1. Now configure the veritas share volume & NFS service


Step-1-  Right click on vcscluster1🡪click on add service Group as show


Stap-2 Enter service group name VCSNFS01🡪 add server vcsnode1 & vcsnode2 🡪 chose startup🡪 choose service group type here I am choosing failover🡪 click ok


Now service group added successfully 

Stap-3 Now add resource in the service group

1. Add NIC


 Right click vcsnfs01🡪click add resource 🡪 Type Resource name🡪choose Resource type 🡪edit attribute device


2. Add IP


2. Right click vcsnfs01🡪click add resource 🡪 Type Resource name🡪choose Resource type 🡪add attribute value.

Device 🡪 eth0

Address🡪192.168.16.145

Netmask🡪255.255.255.0

3. Add Disk Group

Right click vcsnfs01🡪click add resource 🡪 Type Resource name🡪choose Resource type🡪add attribute value.

Disk Group🡪 vcsgp (group name)


4. Add volume1


 Right click vcsnfs01🡪click add resource 🡪 Type Resource name🡪choose Resource type🡪add attribute value.

DiskGroup🡪vcsgp

Volume🡪vcsvol01


  1. Add volume2


 Right click vcsnfs01🡪click add resource 🡪 Type Resource name🡪choose Resource type🡪add attribute value.

DiskGroup🡪vcsgp

Volume🡪vcsvol02


  1. Mount volume1 with mount point.


 Right click vcsnfs01🡪click add resource 🡪 Type Resource name🡪choose Resource type🡪add attribute value.

MountPoint 🡪 /vcsshare01

BlockDevice🡪 /dev/vx/dsk/vcsgp/vcsvol01

FSType        🡪  vxfs

FsckOpt      🡪 -n


  1. Same Mount volume2 with mount point.


 Right click vcsnfs01🡪click add resource 🡪 Type Resource name🡪choose Resource type🡪add attribute value.

MountPoint 🡪 /vcsshare02

BlockDevice🡪 /dev/vx/dsk/vcsgp/vcsvol02

FSType        🡪  vxfs

FsckOpt      🡪 -n

Click ok


cid:image004.png@01D0C0BA.2E5A6330

Now rescue group configuration done and all resource are online on vcsnode1


  1. Now go to node1 and check volume is mounted.


# df –k


[root@vcsnode1 ~]# showmount  –e  10.112.16.145   #here show the output like 

10.112.16.145:/mnt/veritasvol01/vtrsvcsvol01/vcsshare01 


[root@vcsnode1 ~]#  vi /etc/fstab

 10.112.16.145:/mnt/veritasvol01/vtrsvcsvol01/vcsshare01   /vcslock  nfs default  0 0 


      [root@vcsnode2 ~]#  vi /etc/fstab    

     10.112.16.145:/mnt/veritasvol01/vtrsvcsvol01/vcsshare01   /vcslock  nfs default  0 0 


       #mount –a   # Run this command on both node

  1. Right click vcsnfs01🡪click add resource 🡪 Type Resource name🡪choose Resource type

Resource name 🡪Service NFS

Resource type 🡪 NFS


What is RAID ?

  What is RAID?   RAID Levels - How the drives are organized   How to determine your RAID level  RAID 0 - Disk Striping   RAID 1 - Disk Mirr...

most viewed